This article explains how to join tables in SQL Server.
Joining in SQL
There are various type of SQL joinning. A few of them that are commonly used are described below.
There are various type of SQL joinning. A few of them that are commonly used are described below.
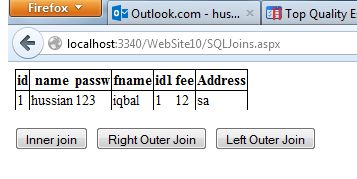
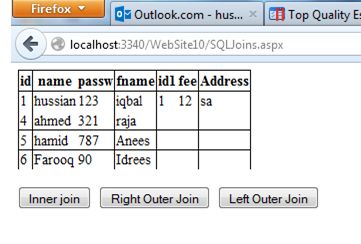
1: Inner join
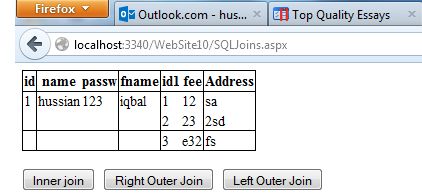
2: Right Outer Join
3: Left Outer join
First Step
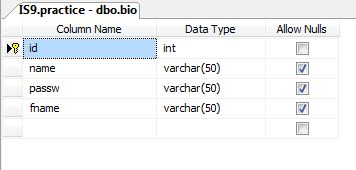
First create a SQL table named bio.
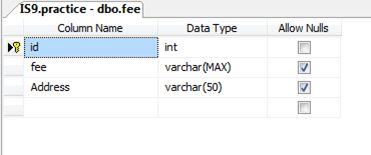
The following is the second table named fee.
Now insert values into the bio table.

Now insert values into the fee table.

Second Step
using System;
using System.Collections.Generic;
using System.Linq;
using System.Web;
using System.Web.UI;
using System.Web.UI.WebControls;
using System.Data.SqlClient;
using System.Data;
public partial class SQLJoins : System.Web.UI.Page
{
protected void Page_Load(object sender, EventArgs e)
{
}
SqlConnection con = new SqlConnection(@"Data Source=IS9;Initial Catalog=practice;User ID=sa;Password=isource");
protected void innerJoin_Click(object sender, EventArgs e)
{
con.Open();
SqlCommand cmd=new SqlCommand ();
cmd.Connection = con;
cmd.CommandText = "Select * From bio Inner Join fee on bio.id=fee.id";
SqlDataAdapter da = new SqlDataAdapter(cmd);
DataSet ds = new DataSet();
da.Fill(ds);
GridView1.DataSource = ds;
GridView1.DataBind();
con.Close();
}
protected void RightOuterJoin_Click(object sender, EventArgs e)
{
con.Open();
SqlCommand cmd = new SqlCommand();
cmd.Connection = con;
cmd.CommandText = "Select * From bio Right Outer Join fee on bio.id=fee.id";
SqlDataAdapter da = new SqlDataAdapter(cmd);
DataSet ds = new DataSet();
da.Fill(ds);
GridView1.DataSource = ds;
GridView1.DataBind();
con.Close();
}
protected void LeftOuterJoin_Click(object sender, EventArgs e)
{
con.Open();
SqlCommand cmd = new SqlCommand();
cmd.Connection = con;
cmd.CommandText = "Select * From bio Left Outer Join fee on bio.id=fee.id";
SqlDataAdapter da = new SqlDataAdapter(cmd);
DataSet ds = new DataSet();
da.Fill(ds);
GridView1.DataSource = ds;
GridView1.DataBind();
con.Close();
}
}
Comments
Post a Comment